


Titan Assembly
Caveat: The following description was originally published on a now-defunct blog, and as such is formatted for a more inline style of reading, with images embedded in the text. All relevant images are in the gallery on this page. Some of the text might read a little odd in this new context.
Body Plan
The existing design makes a Warhound torso very front-heavy. While this adds to the dynamism of the model when it has both feet planted, it would be too much when combined with the pose I was after. In addition, I’m not fond of the shoulder placement on Warhounds and I wanted to move them back, and give them more articulation.
I’m going to skip the basic stuff and get straight to the customization. Assembling the torso pieces was all done with 2 part epoxy and brass rod for reinforcement. You can see some of the rod entry holes in these pictures if you look closely.
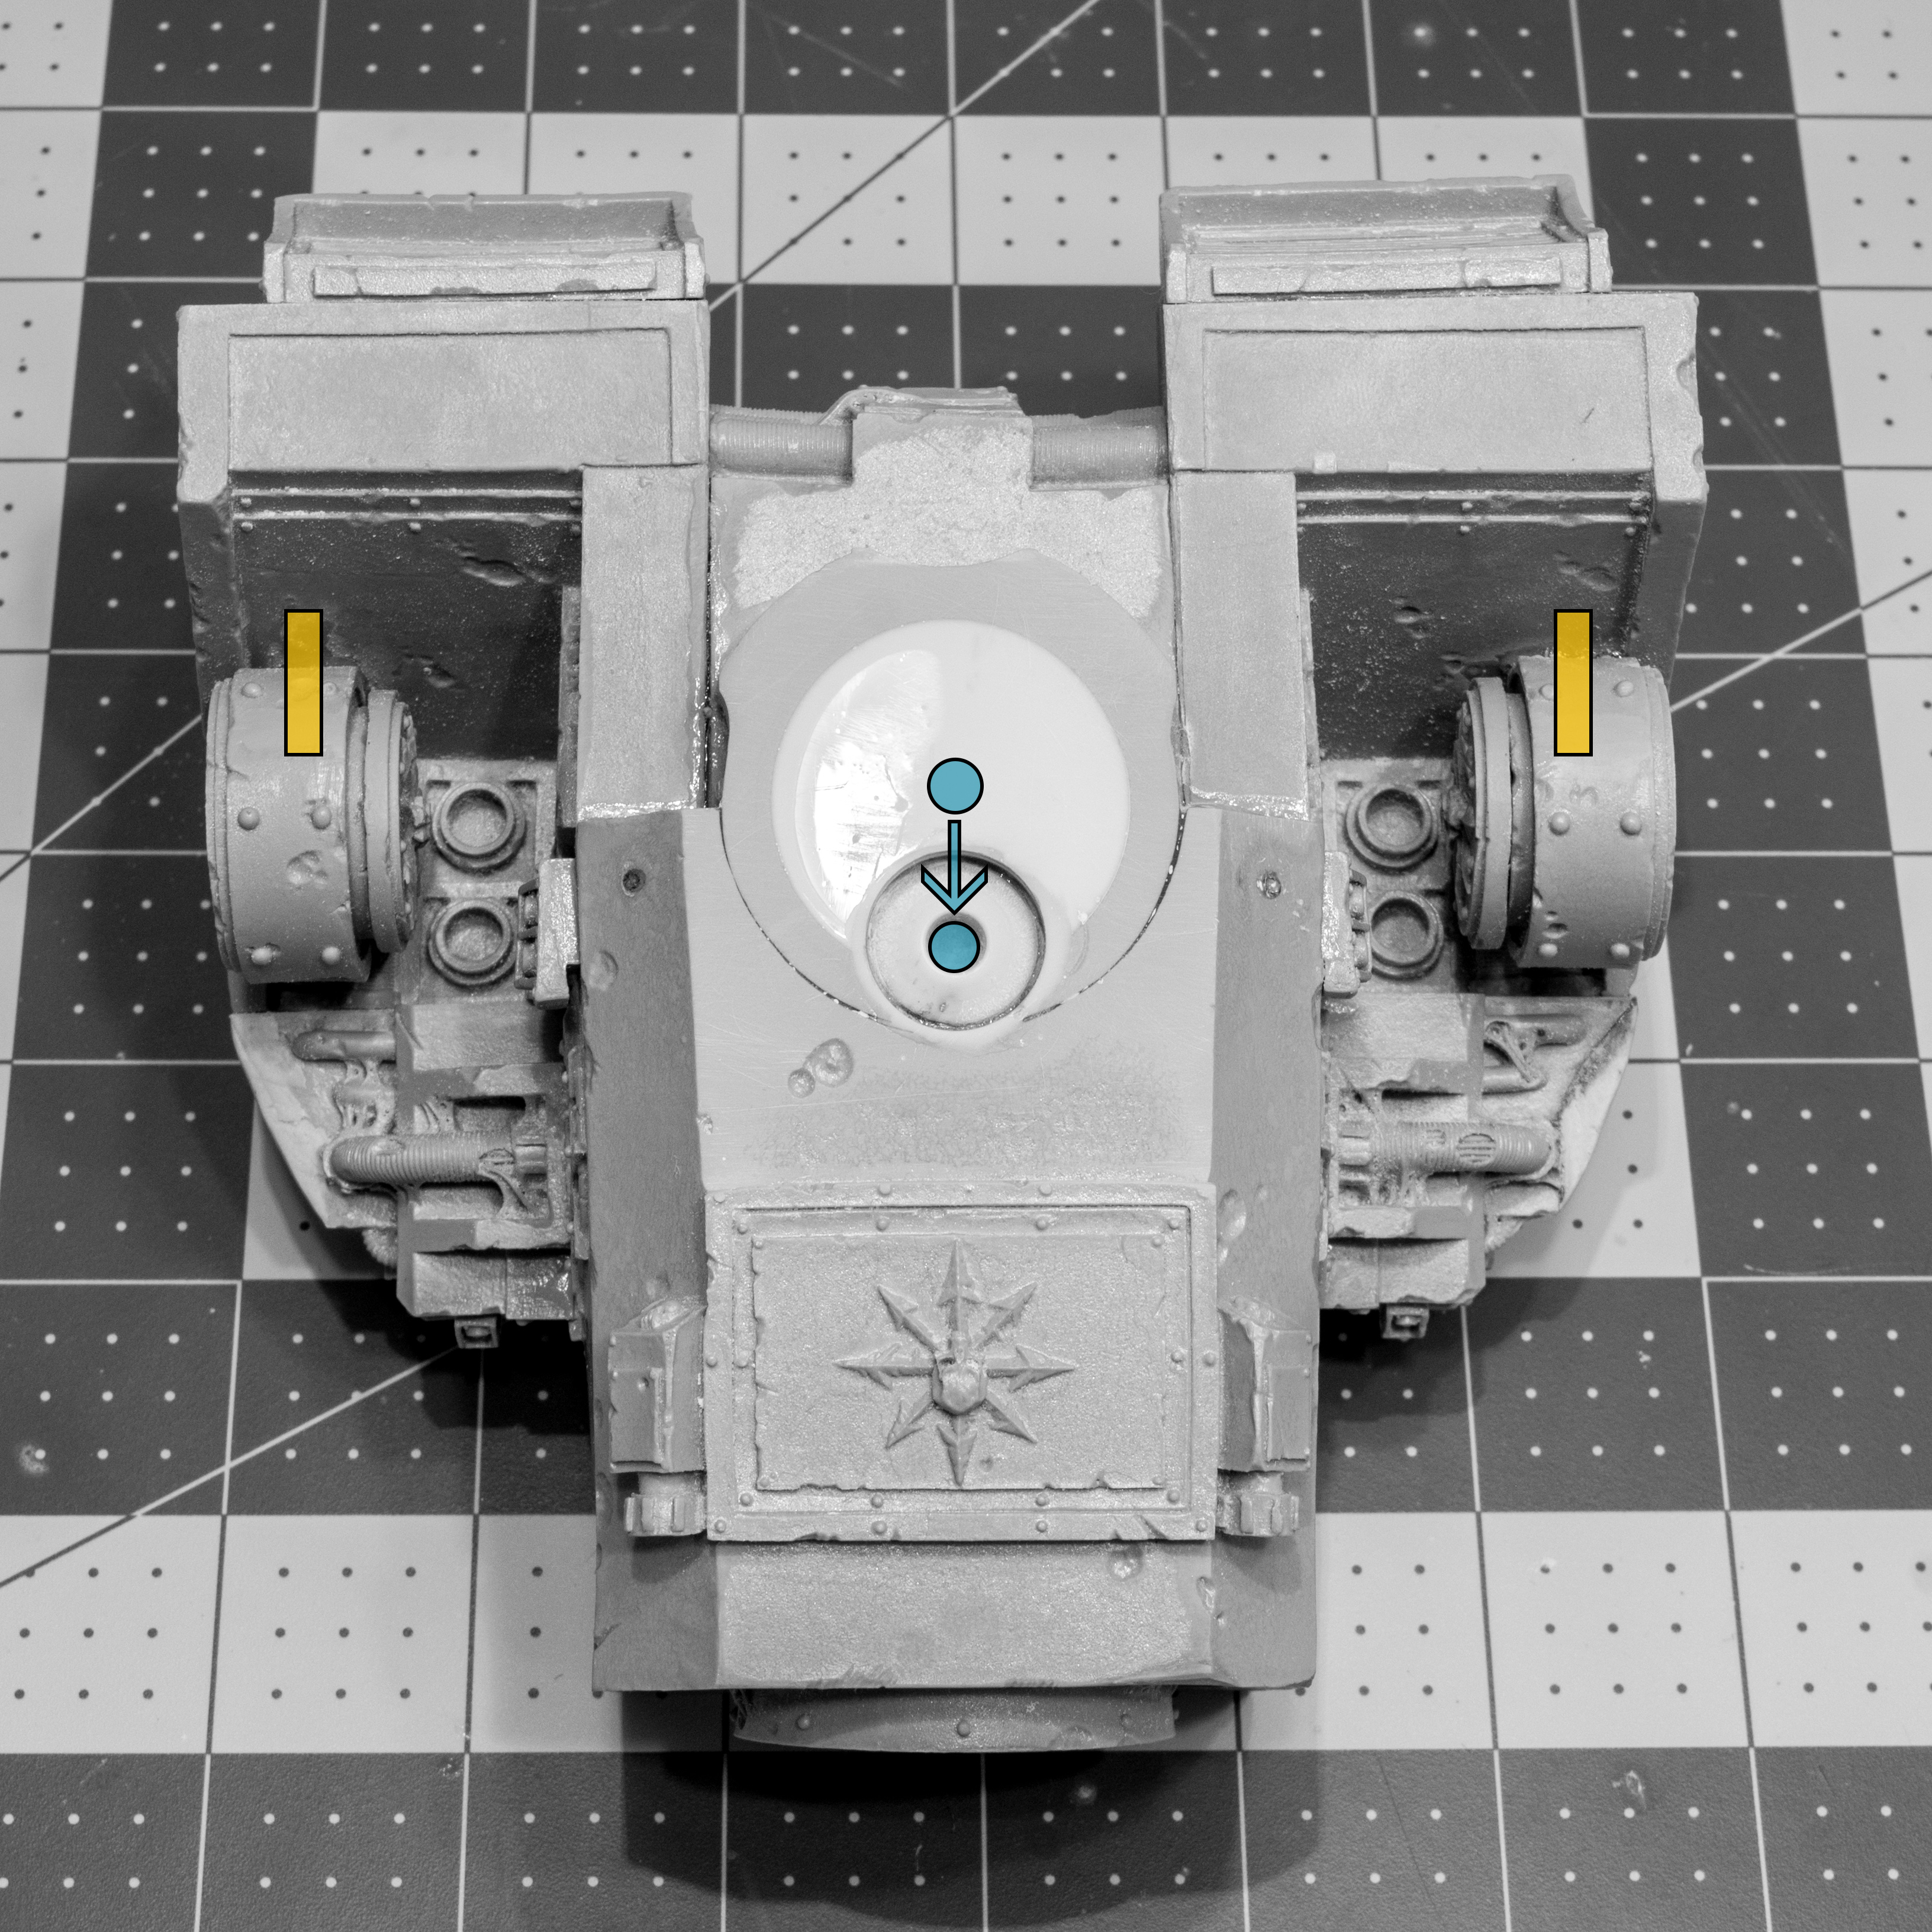
So first up, I changed the center of rotation for the torso. I filled the existing hole with Alumilite resin, which cures fast, and then drilled a new, smaller hole further forward.
Center of rotation change in blue. Brass rod for the arm sockets in yellow.
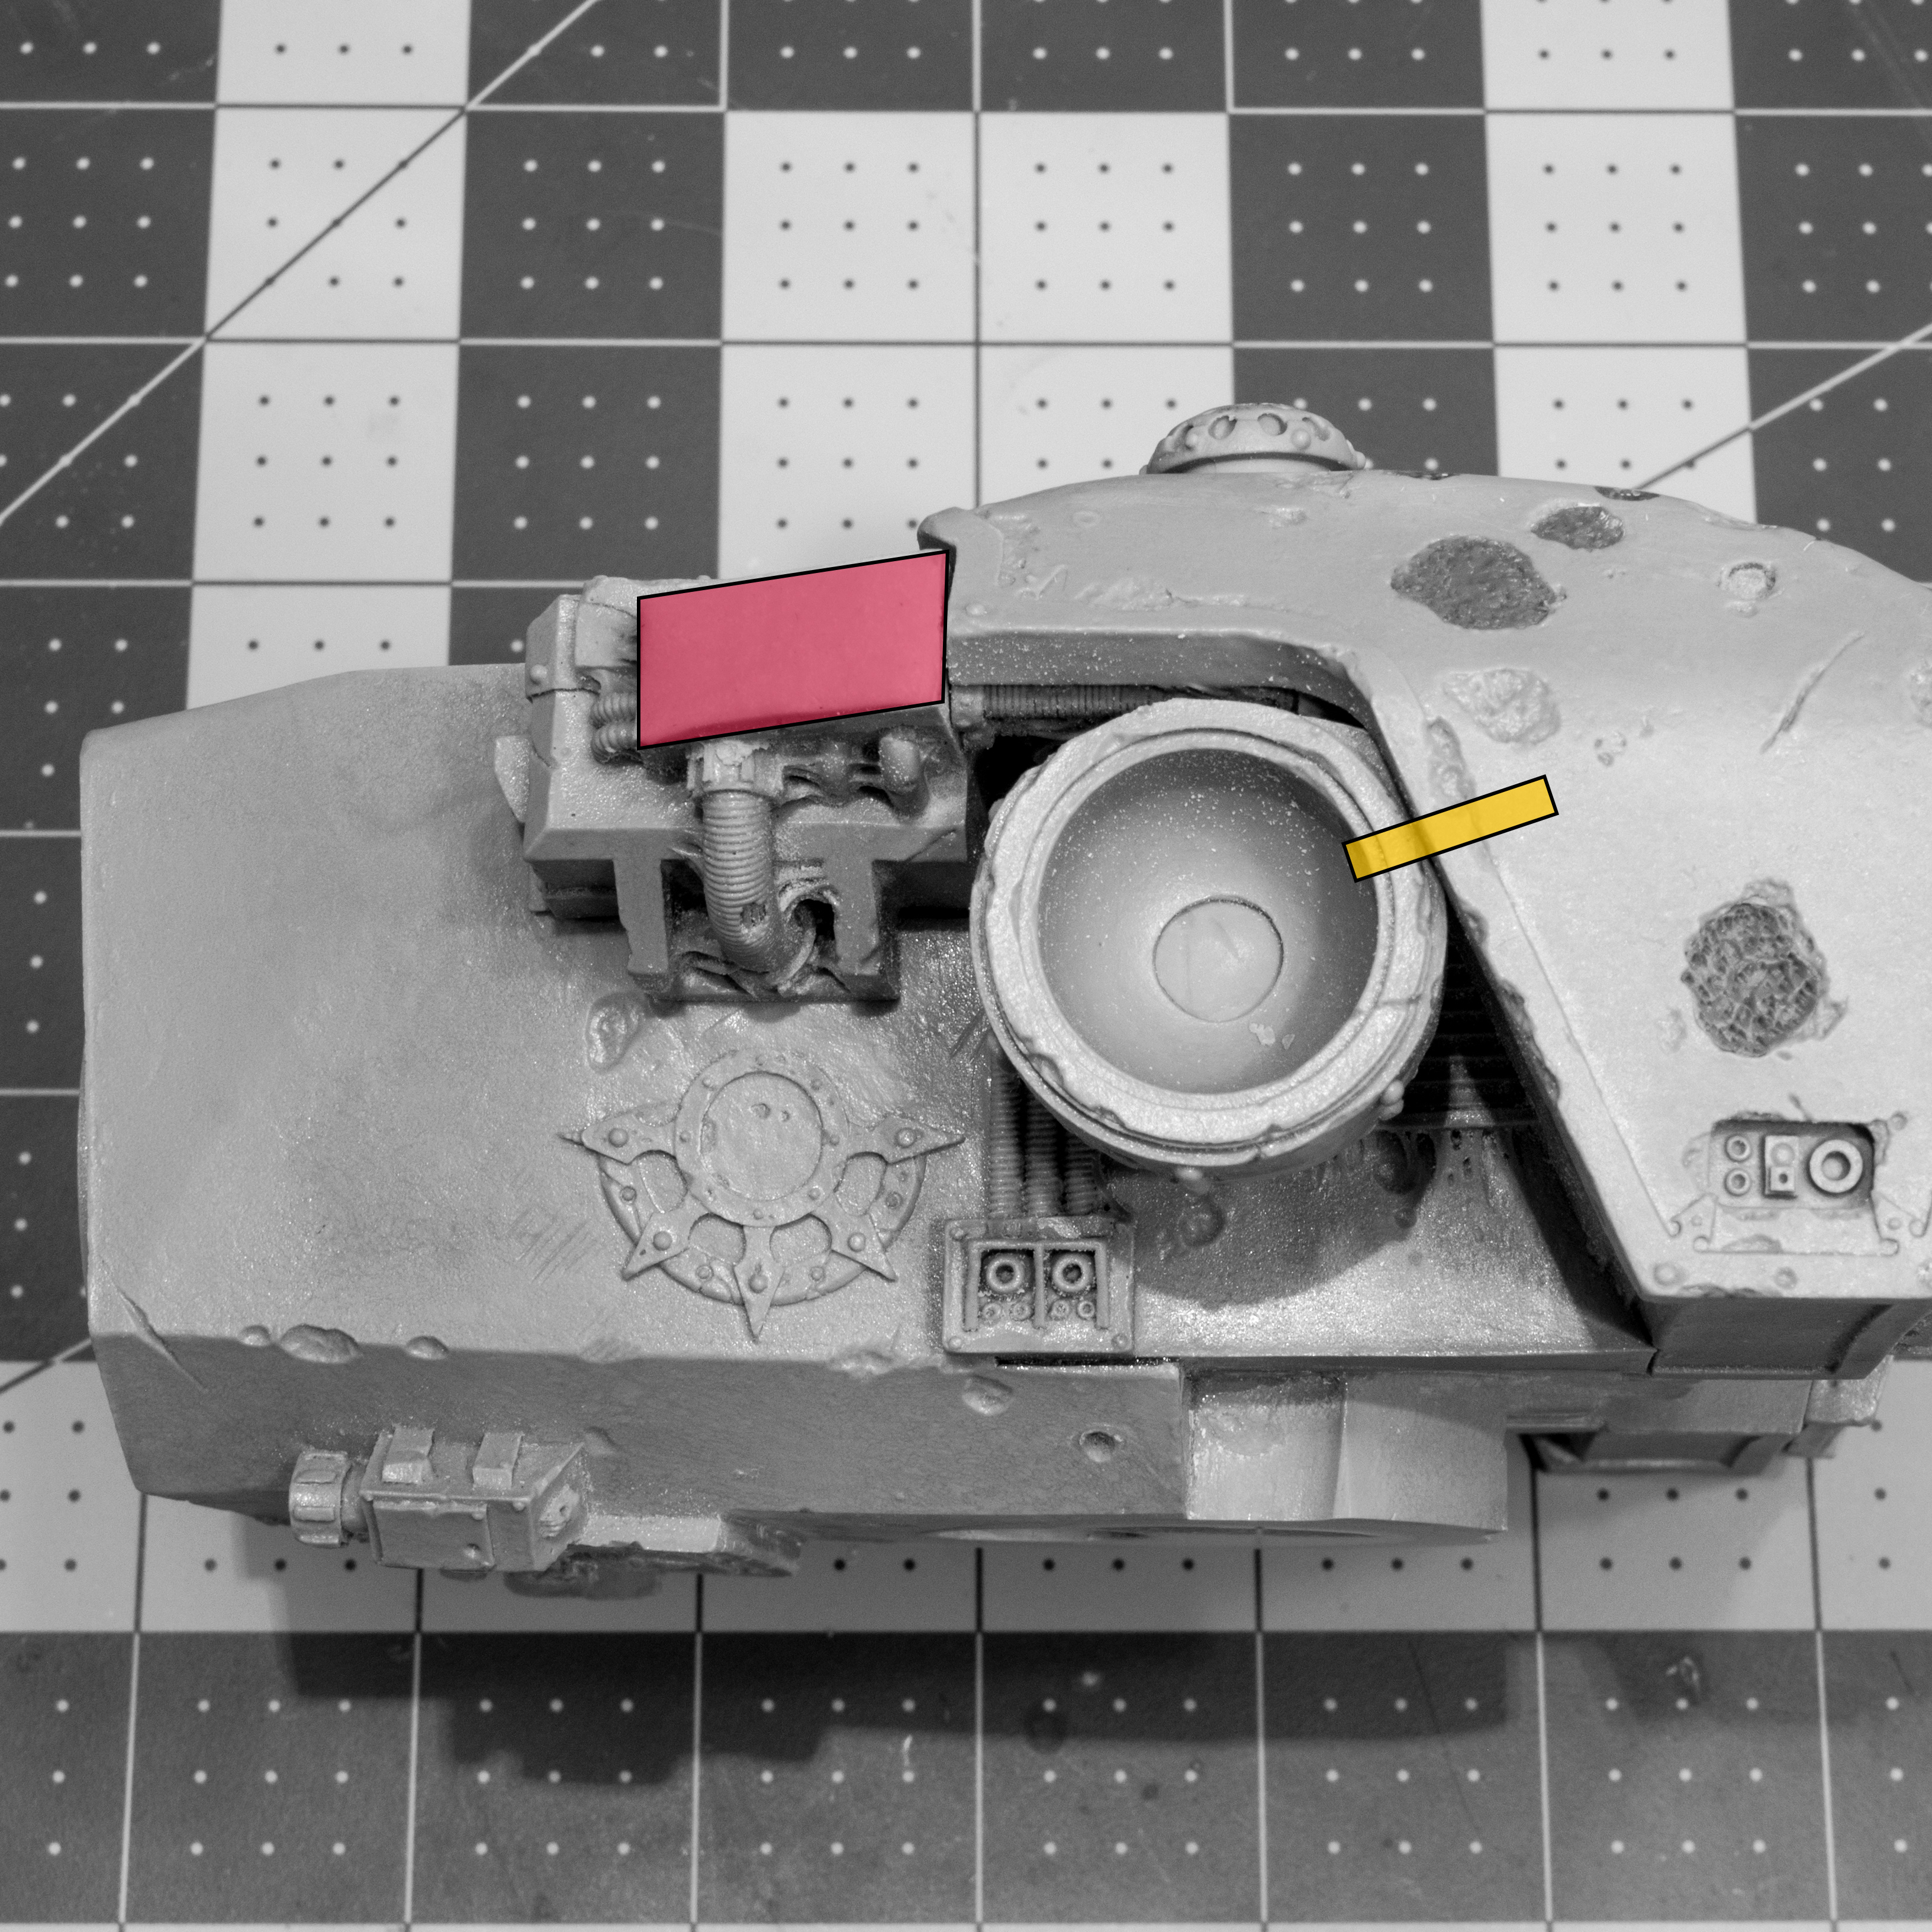
As you can see in the image I also sawed off the arm sockets and re-mounted them at 90 degrees and further back. I then puttied over the stump with magicsculpt/greenstuff mixed about 70/30. Easier to sand but still a bit sticky.
Puttied area shown in red. Brass rod for arm socket in yellow.
The arm sockets are secured in their new positions using JBWeld and a piece of 1/8″ brass rod. I haven’t tidied these connections up yet; I plan on running some cables from the red area so I’ll probably install some sockets using brass tube. TheseWith the new, smaller mounting hole for the waist drilled, I then sawed off the corresponding peg on the hip section and added an angled spacer using pvc pipe and resin. Once that was cured I drilled another hole and used a piece of 5/8″ copper pipe to build a new peg. This also let me install some magnets in the peg to add a little more security to the connection. While this isn’t for gaming, it’s handy to be able to break the model down. I haven’t installed the corresponding magnets in the torso section yet, but the fit is so tight already, it’s not urgent.
New Arms
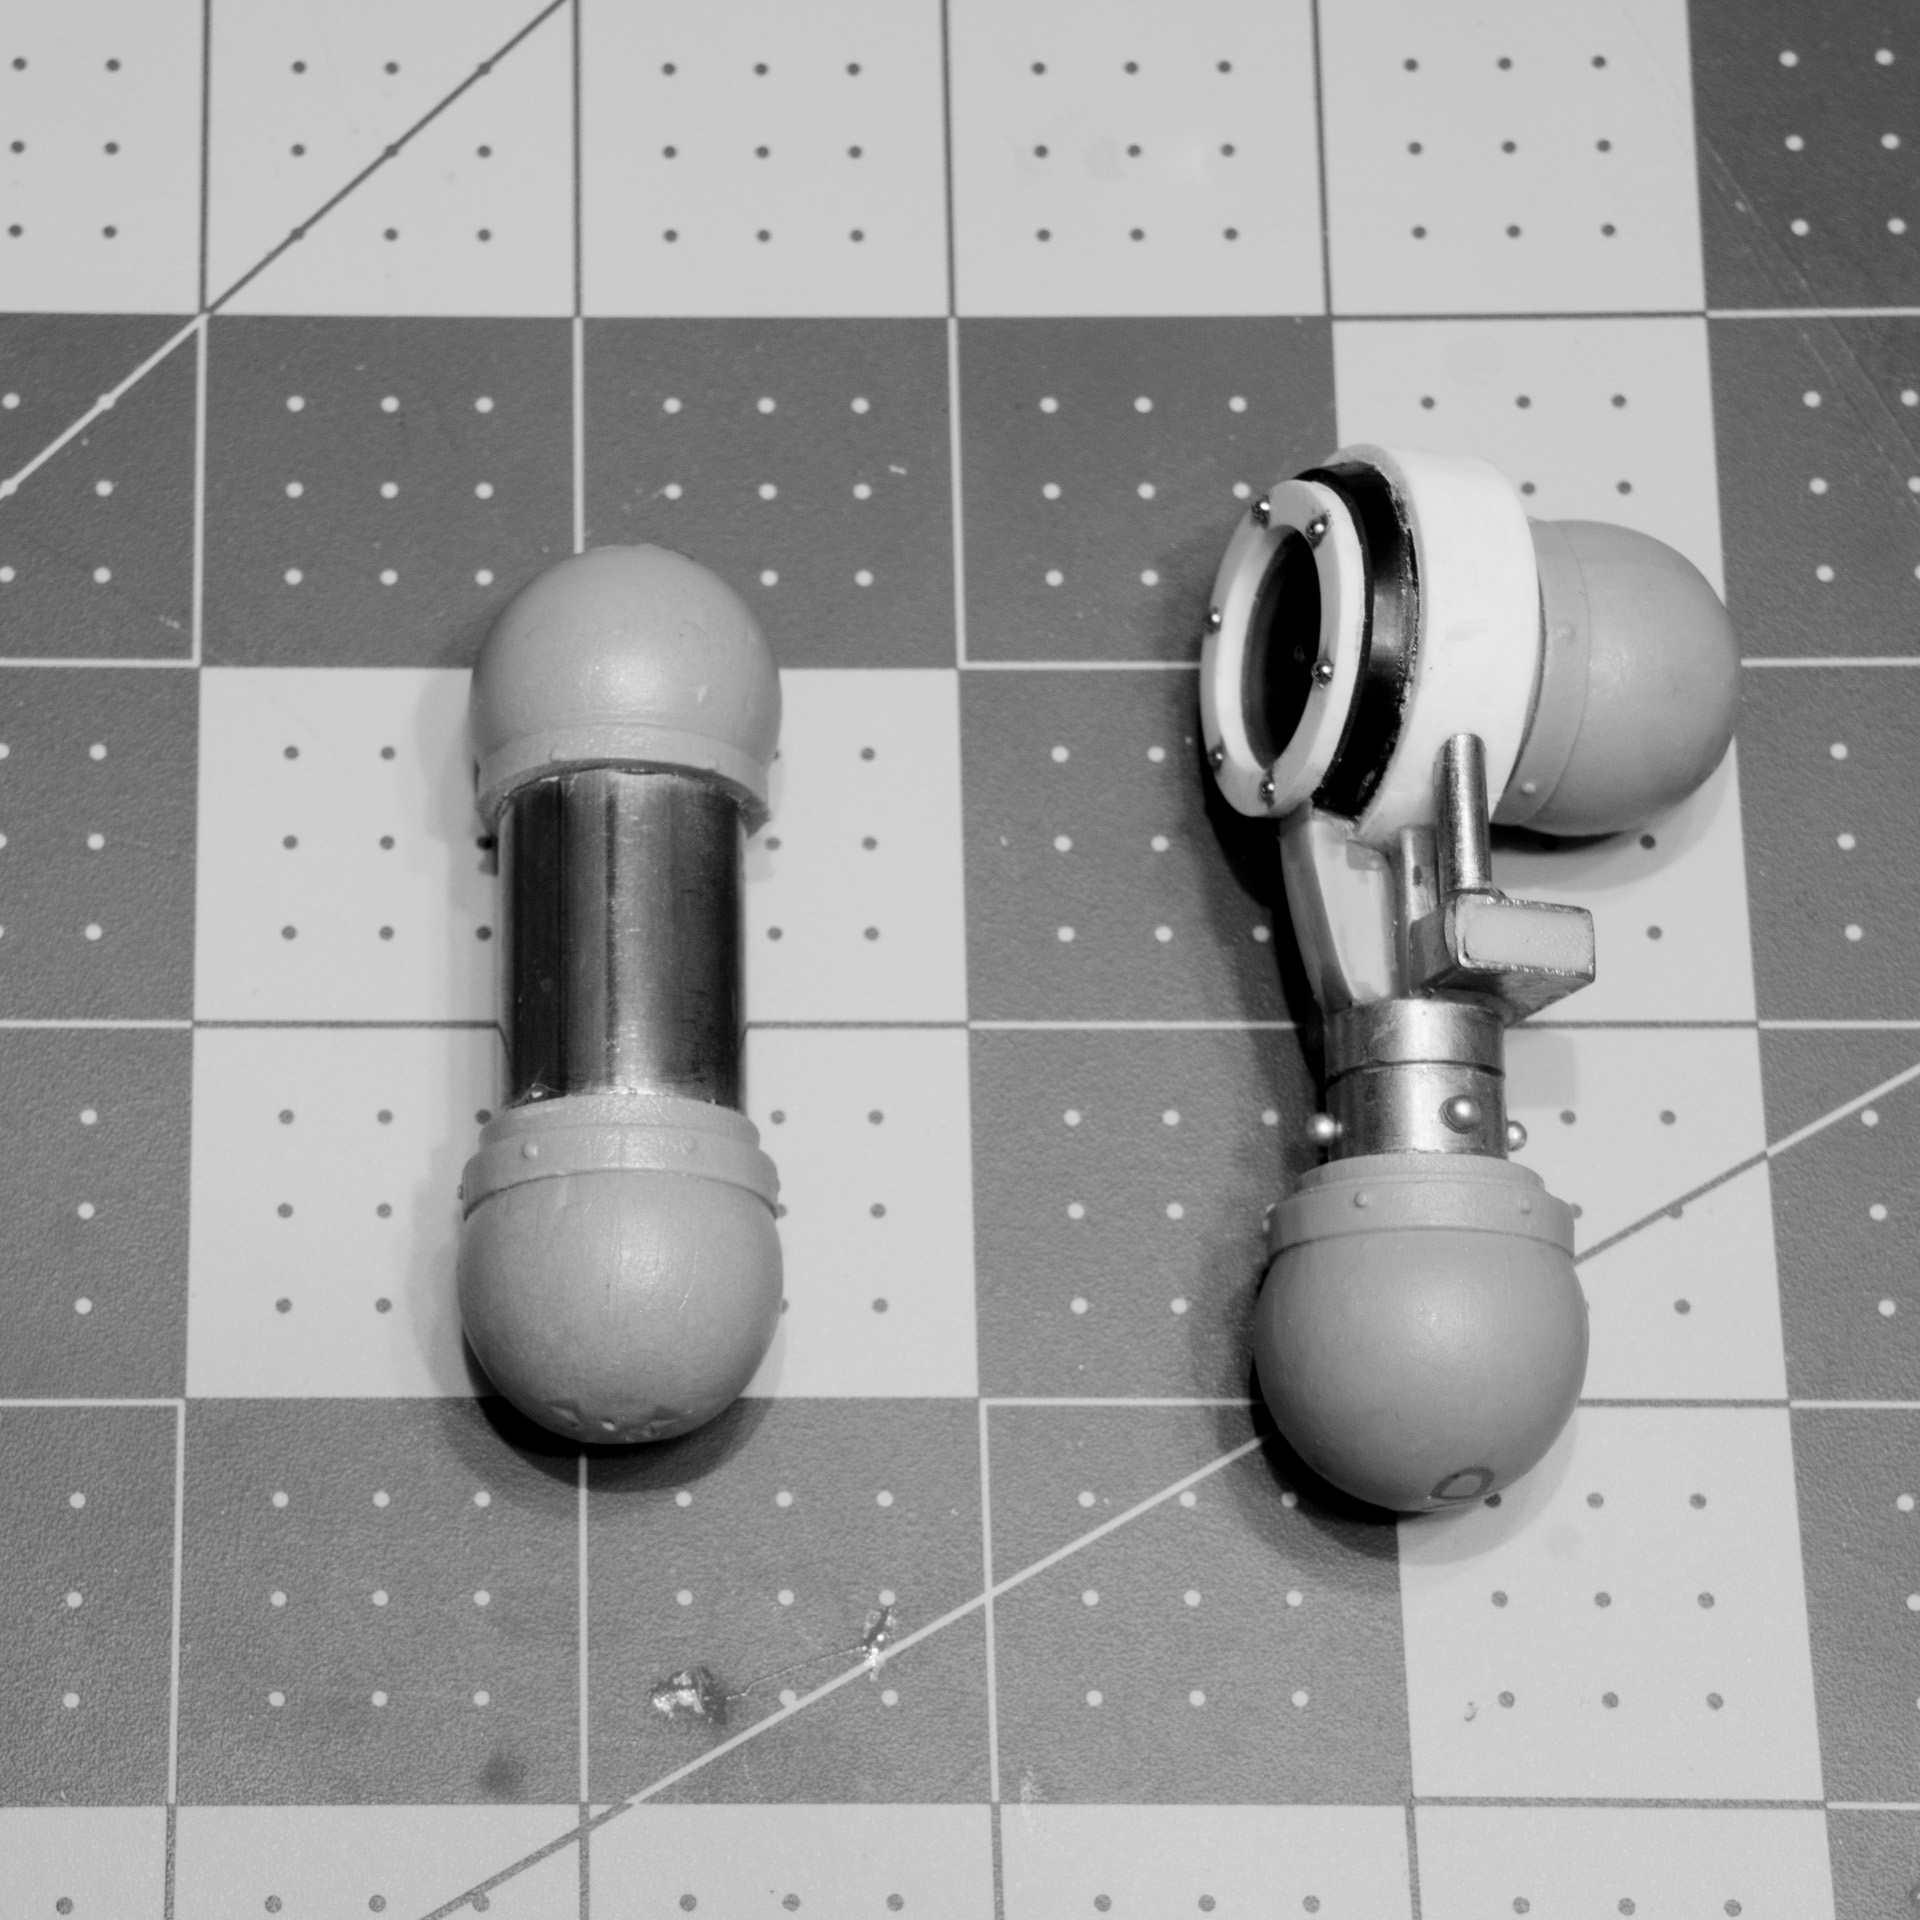
These went through a couple of revisions; firstly an extension of the existing design using copper pipe. This was almost the right length, but the change in orientation of the sockets meant the weapons never sat level. So for version two I bit the bullet and designed something a little more complex with a right-angle in it. Materials consist of various bits of PVC and brass tubing, a 25mm base and some ball-bearings.
Legs Layout and Assembly
I’m not going to lie: this sucked. If I ever decide to do more large, heavy models like this, I’m going to invest in extra clamps and arms to hold things like torsos steady while I work on the leg pose.
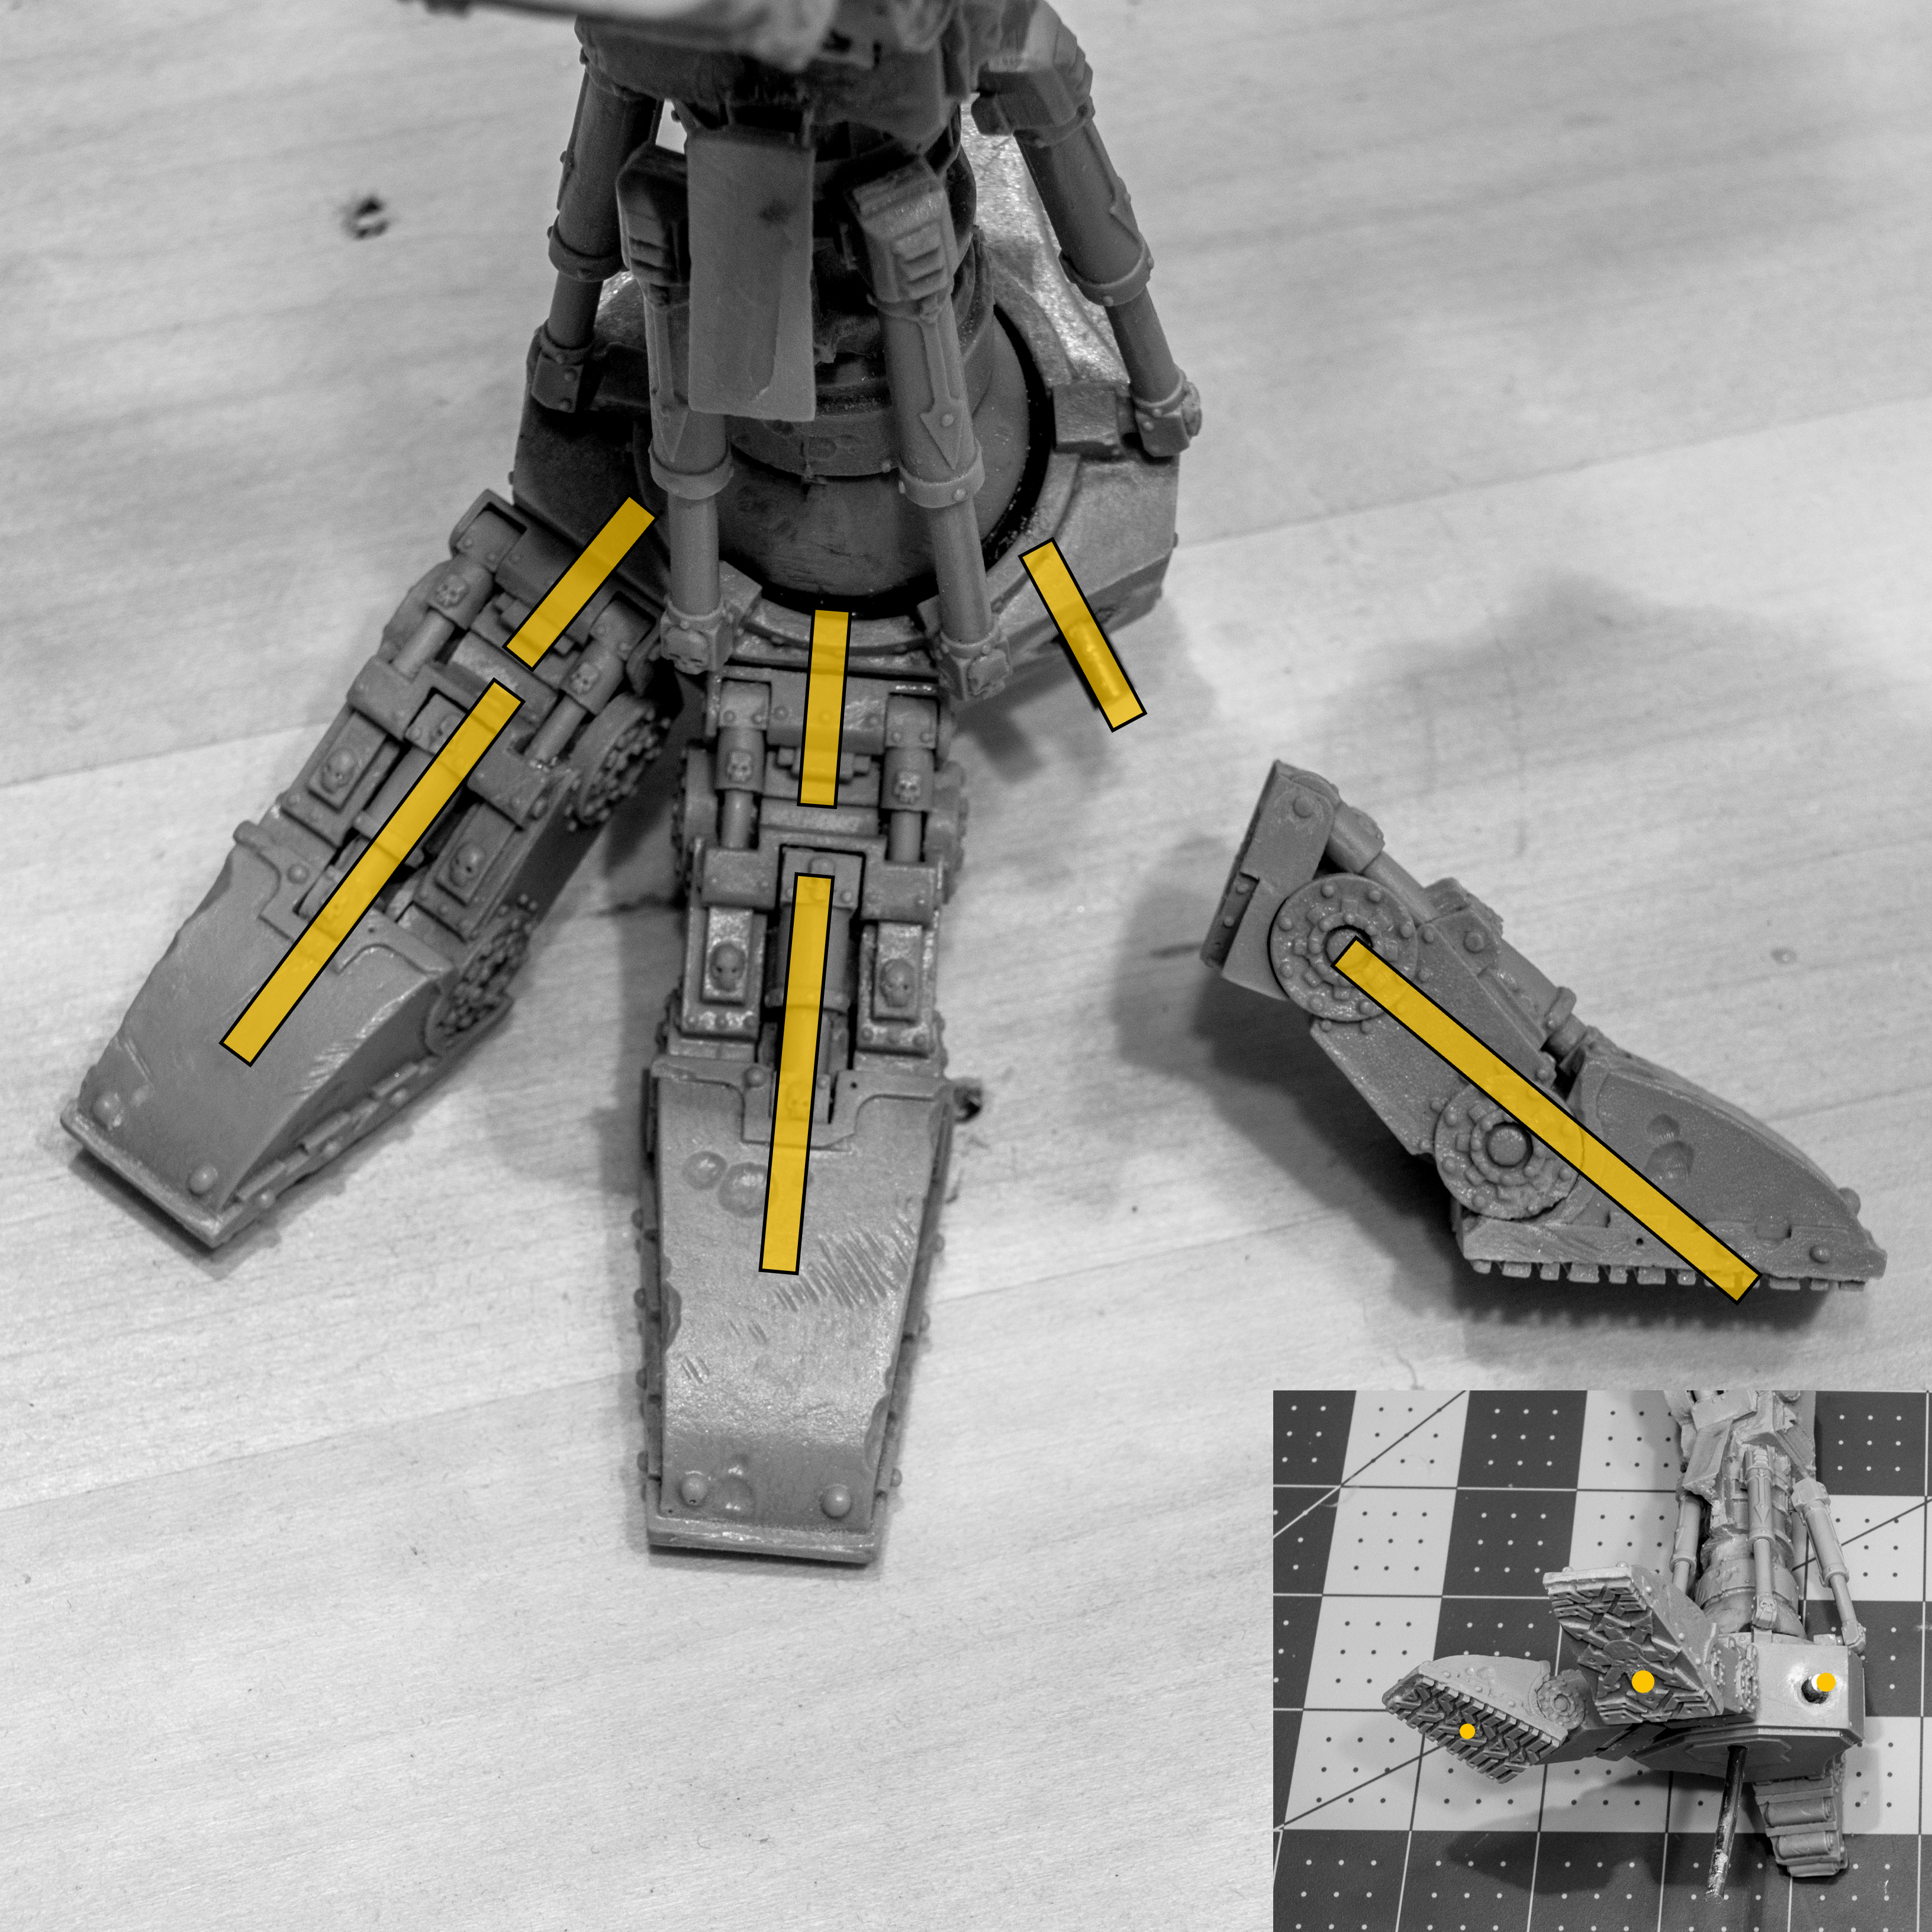
I started with a rough idea of the pose and pinned the right foot (no toes at this point) to the stand which is a 12″wooden plate from Michaels craft store. For all the leg work I used 1/8″ brass rod (except in the hips where I ran a second 1/16 rod to stop the hips spinning), and JB Weld as my adhesive for load bearing joints.
Then it’s on to posing and pinning all the joints. I drill and pin everything first, so I can dry fit and check the pose. often I’ll end up filling the holes with resin and re-drilling to tweak the joint angles until I’m happy with them. I run rod perpendicular the joint axis of rotation rather than along it to prevent joints spinning.
The trick I use for adding the pins is to eyeball the axis along which I need to run the brass rod, drill the hole in the “female” side of the joint and glue in the pre-cut brass rod with CA Glue. Then I put a dab of black paint on the end of the rod and position the “male” joint so the rod touches where I need to drill and leaves a nice black dot. Then I drill that along the same axis and the joint is ready for dry fitting.
I work my way up from the right foot, over the hips and down the left, checking my posing all the way, and not gluing any joints except the toes.
Once everything is lined up how I want it, I secure the joints using JB Weld.
0 Comments